[🇨🇳 简体中文](./README.md) | [🇬🇧 English](./README_en.md)
# 🦞 DataClaw
> **Unleash the claws on your data, making analysis as easy and refreshing as raising lobsters!** 🌊📊
> DataClaw is your intelligent, AI-powered Data Analysis Platform. Chat with your data, visualize insights instantly, and build dashboards—all through natural language. No SQL degree required!
***
## ✨ Why DataClaw?
Tired of writing complex SQL queries just to get a simple bar chart? DataClaw acts as your personal data scientist. Powered by advanced LLMs and an intelligent agentic workflow, it translates your questions into database queries, fetches the data, and renders beautiful visualizations on the fly.
Whether you're querying a massive Supabase/PostgreSQL database or just tossing in a CSV file, DataClaw's got you covered! 🚀
## 🌟 Key Features
- **🗣️ Chat to SQL**: Ask questions in plain English (or Chinese!). DataClaw understands your schema, generates accurate SQL, and self-corrects if things go sideways.
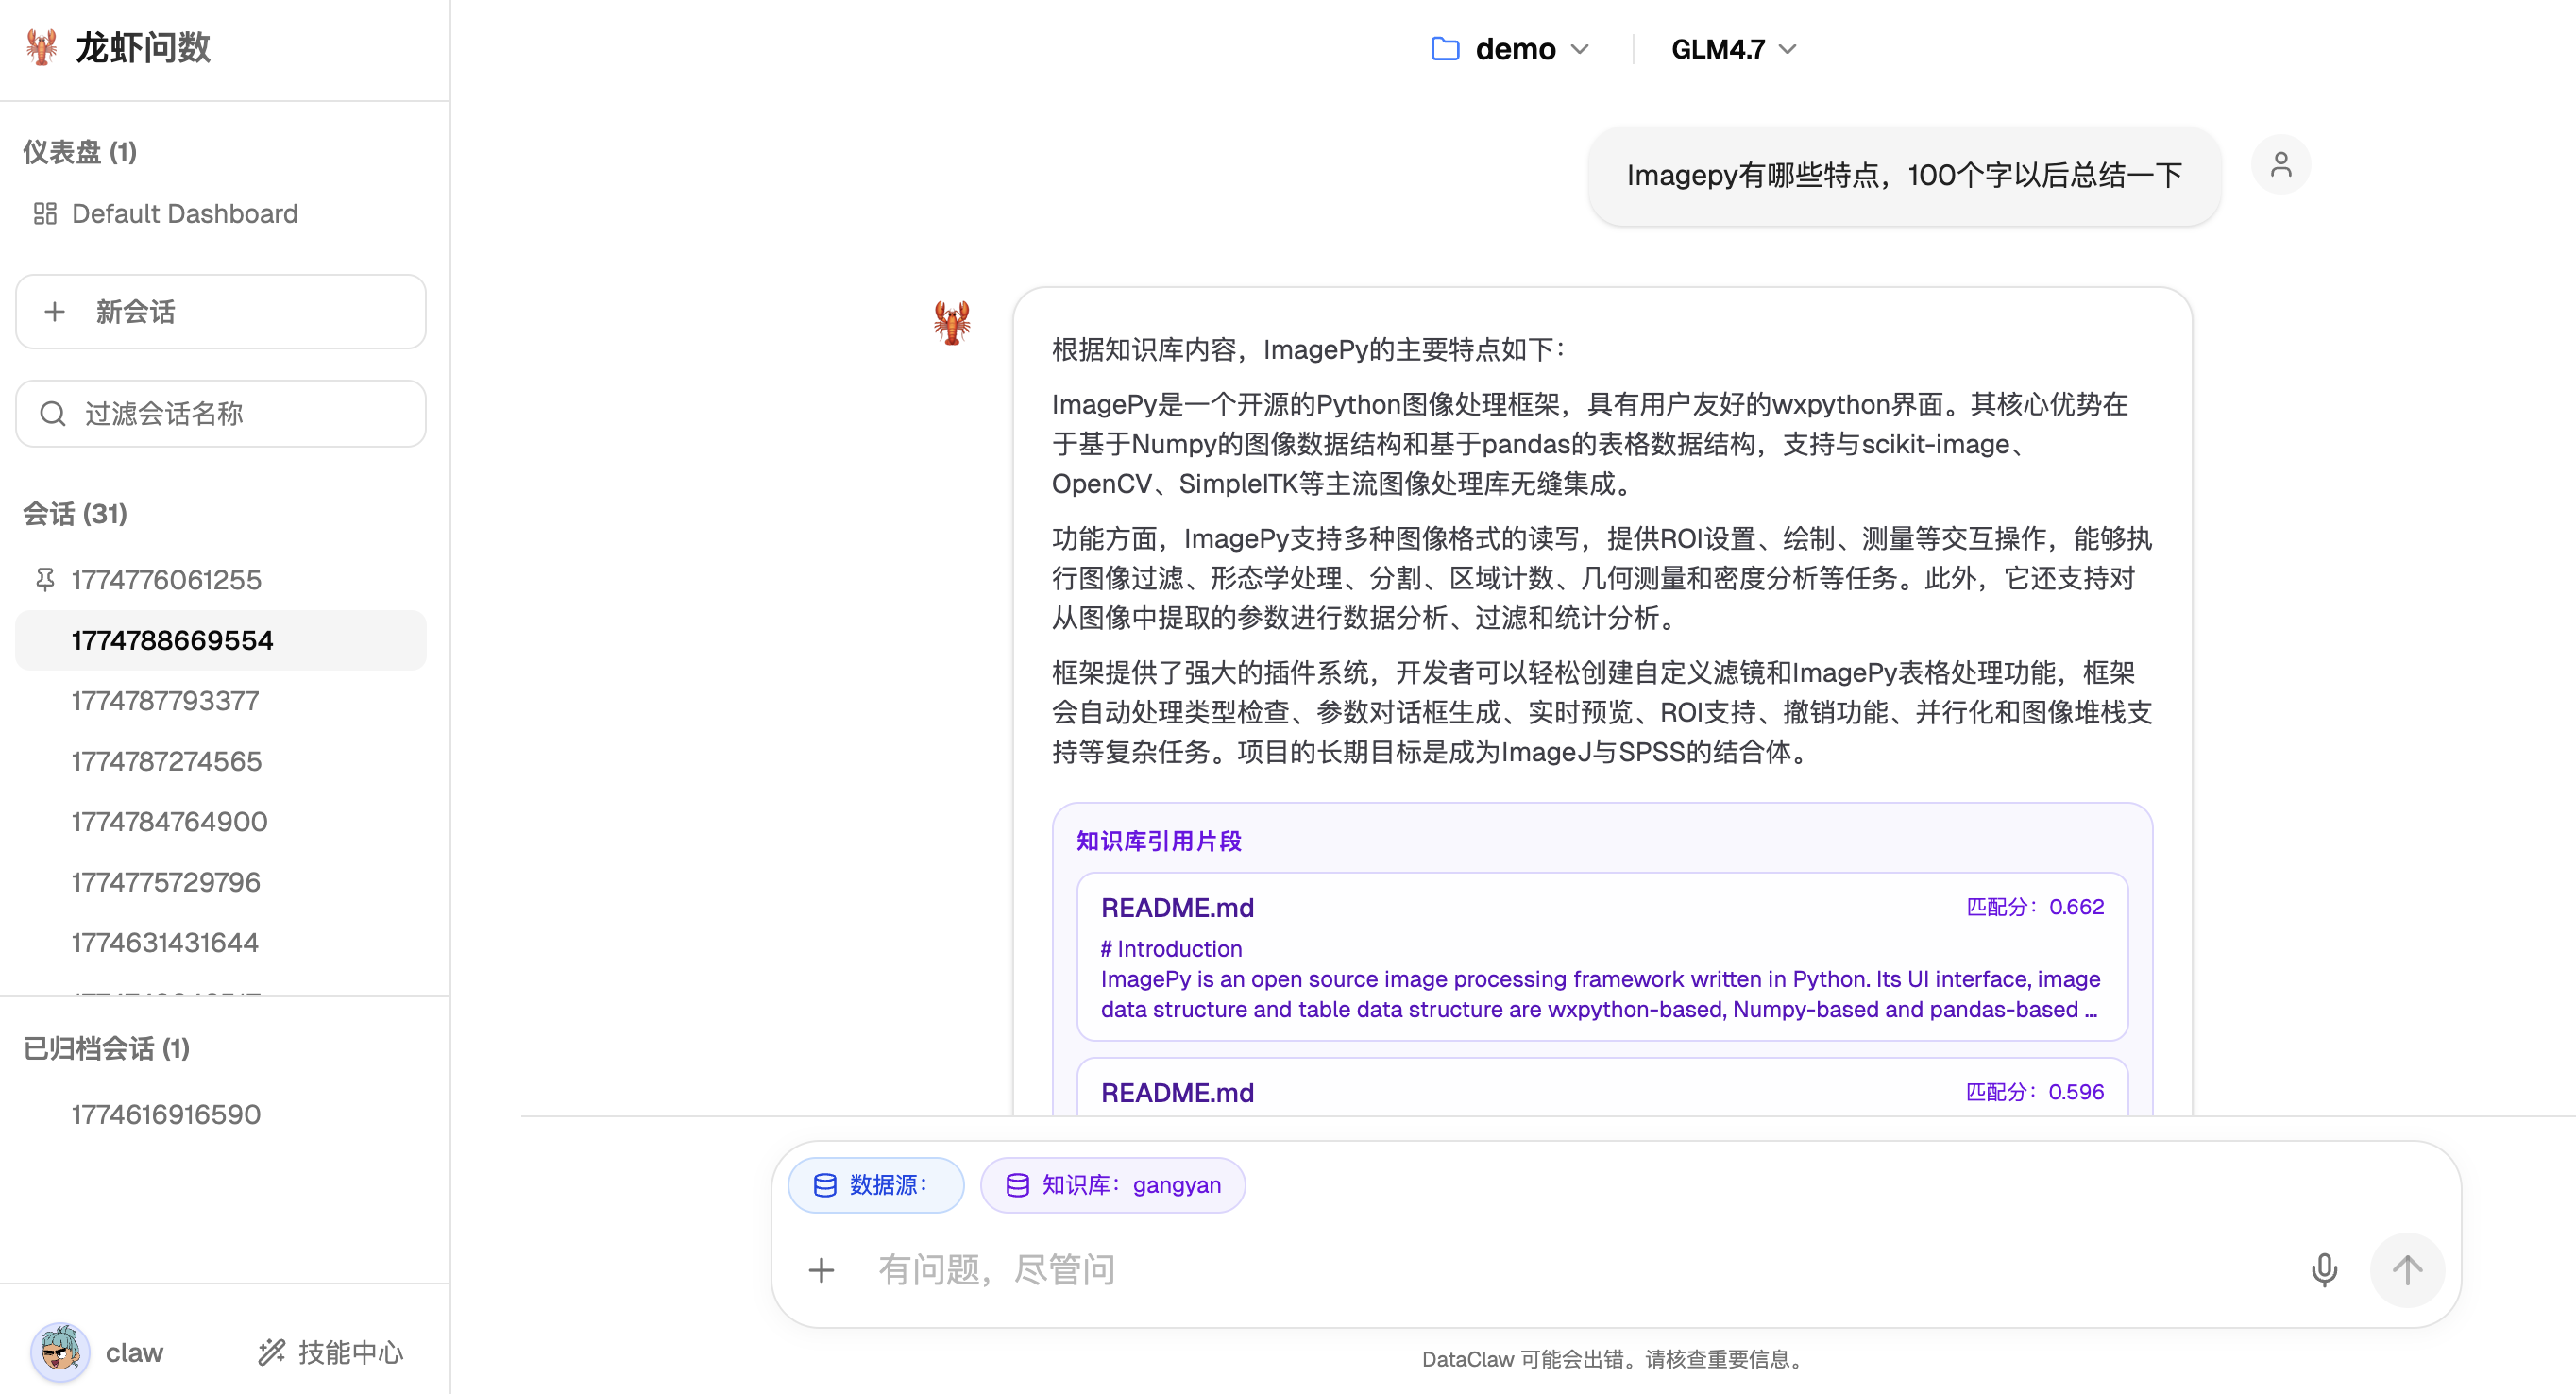
- **📚 Smart Knowledge Base (RAG)**: Support uploading Word, PPT, PDF and other document formats. Enhance answers through vector retrieval, making your private documents "speak".
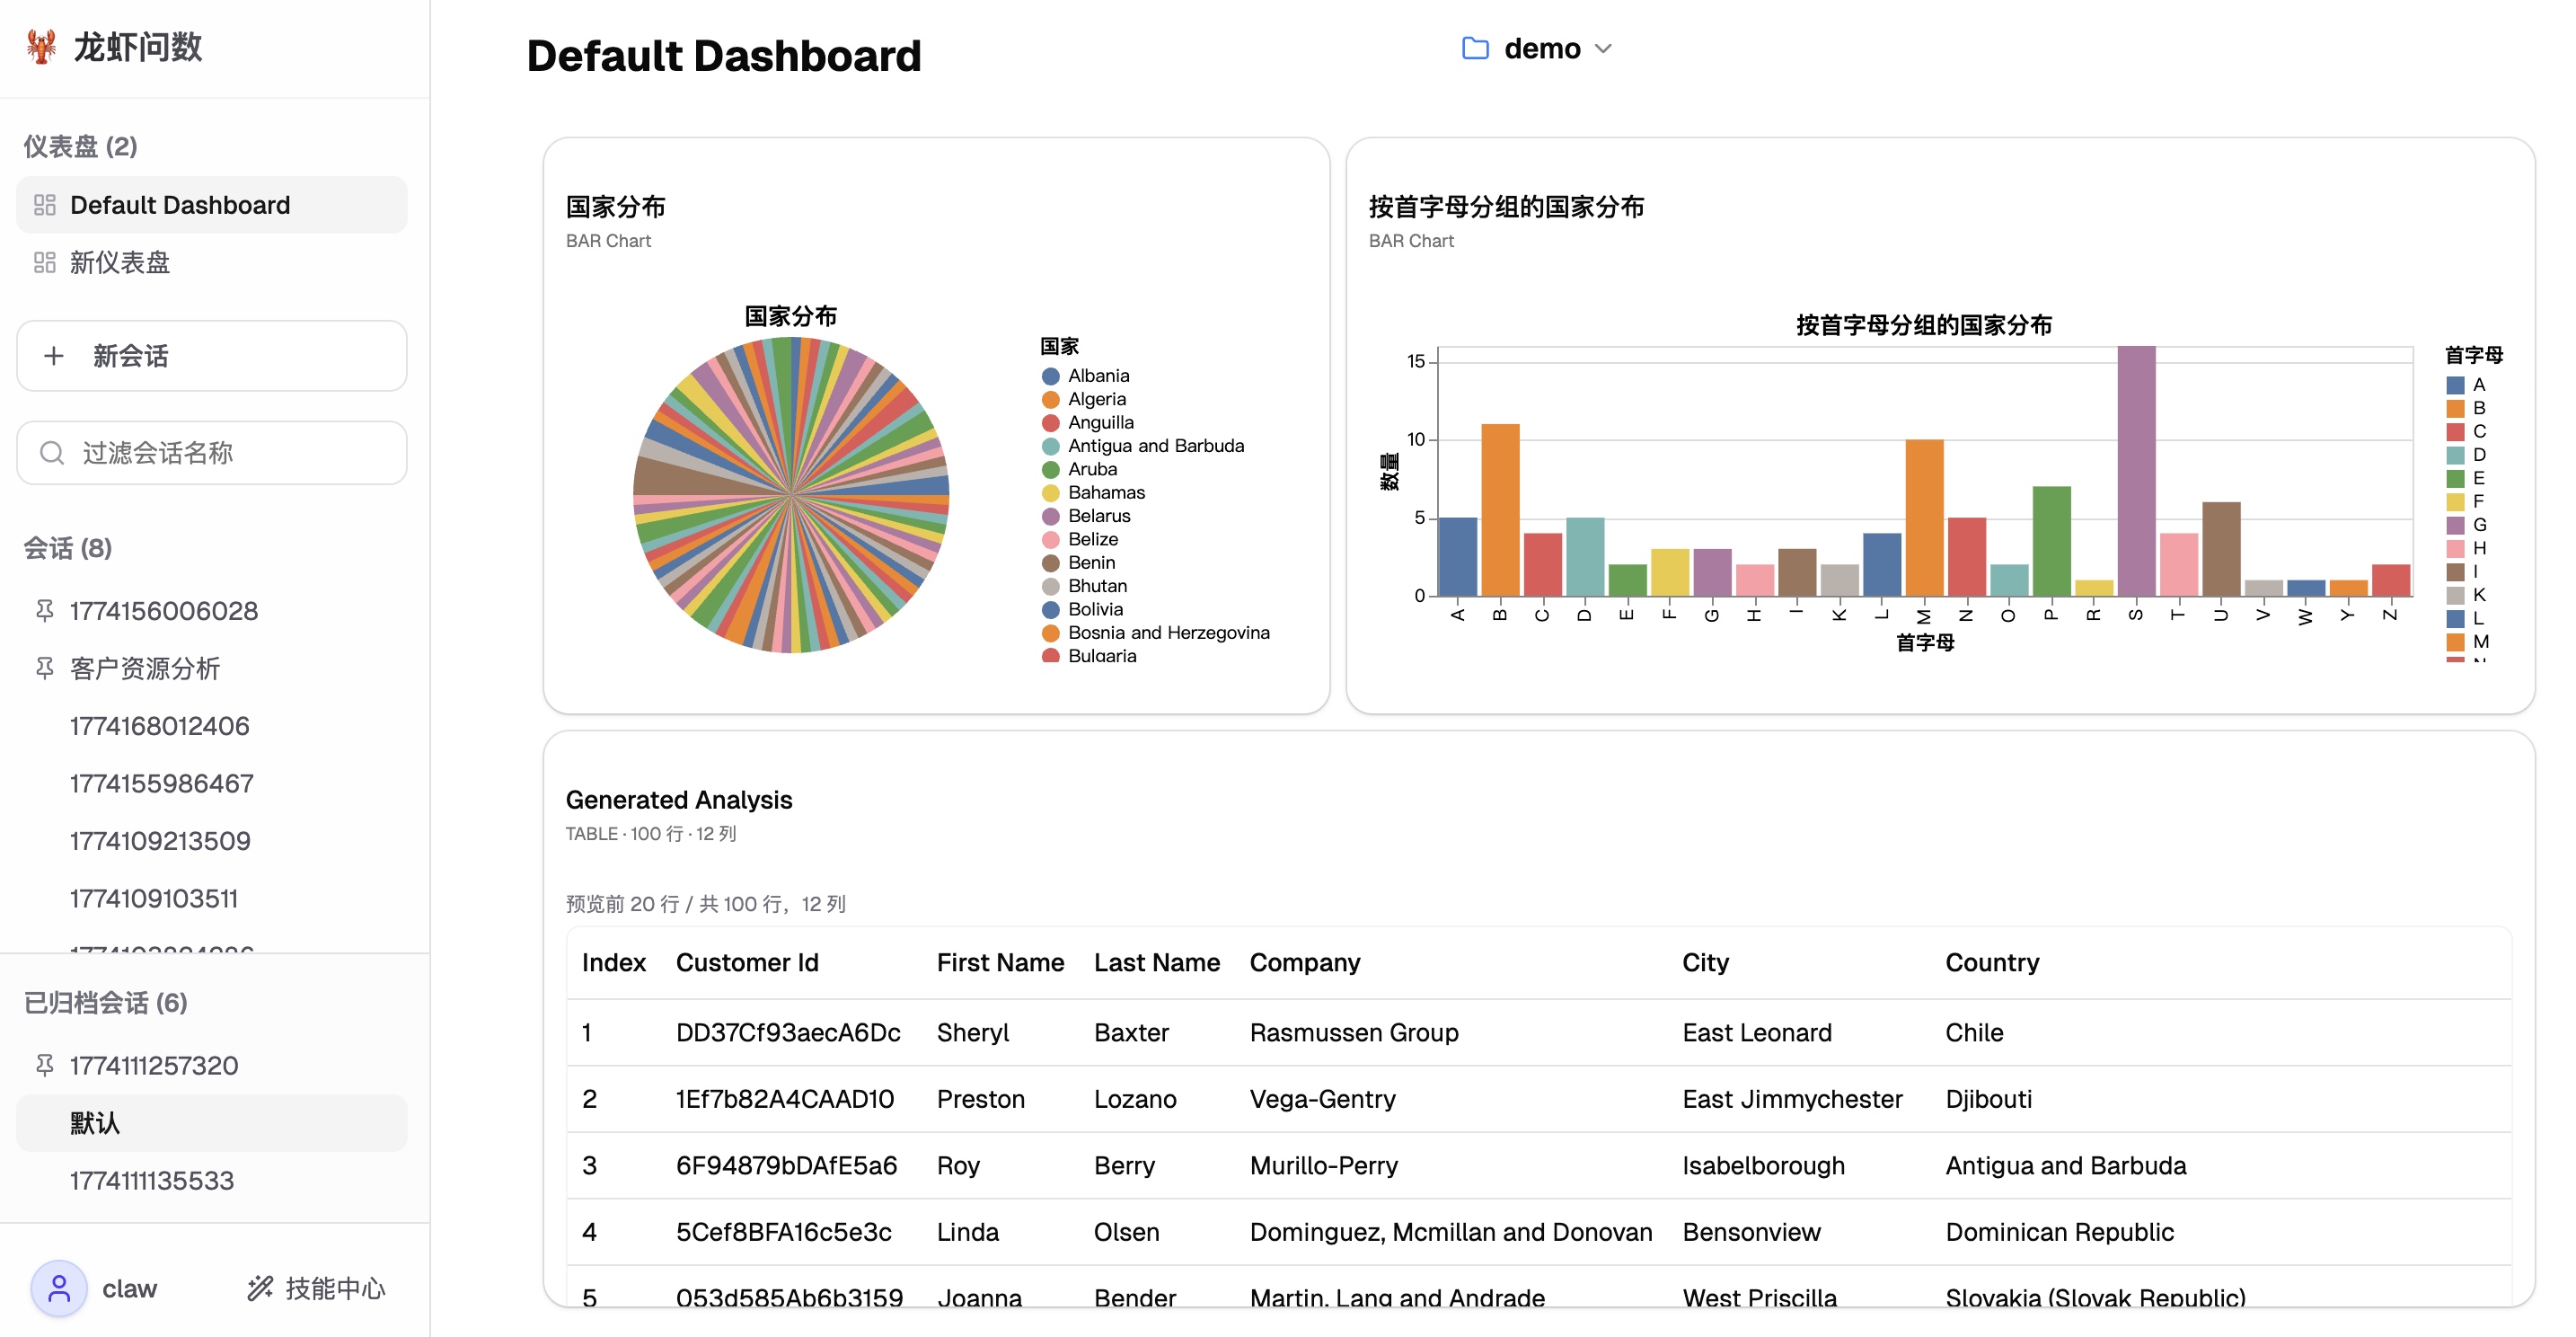
- **📈 Instant Visualizations**: Returns not just raw tables, but auto-generated interactive charts tailored to your data's shape.
- **🗂️ Multi-Source Ready**: Connects seamlessly to PostgreSQL, Supabase, and local CSV/Excel uploads.
- **🧠 Bring Your Own LLM**: Native integration with LiteLLM. Plug in OpenAI, DeepSeek, Zhipu, DashScope, Volcengine, or any compatible provider.
- **🛠️ Extensible Agent Skills**: Built on top of the powerful `nanobot` framework (a lightweight version of `OpenClaw`). Add custom tools and slash commands (`/`) to tailor the agent to your specific business logic.
- **📊 Customizable Dashboards**: Pin your favorite chat-generated charts to a drag-and-drop dashboard for quick access.
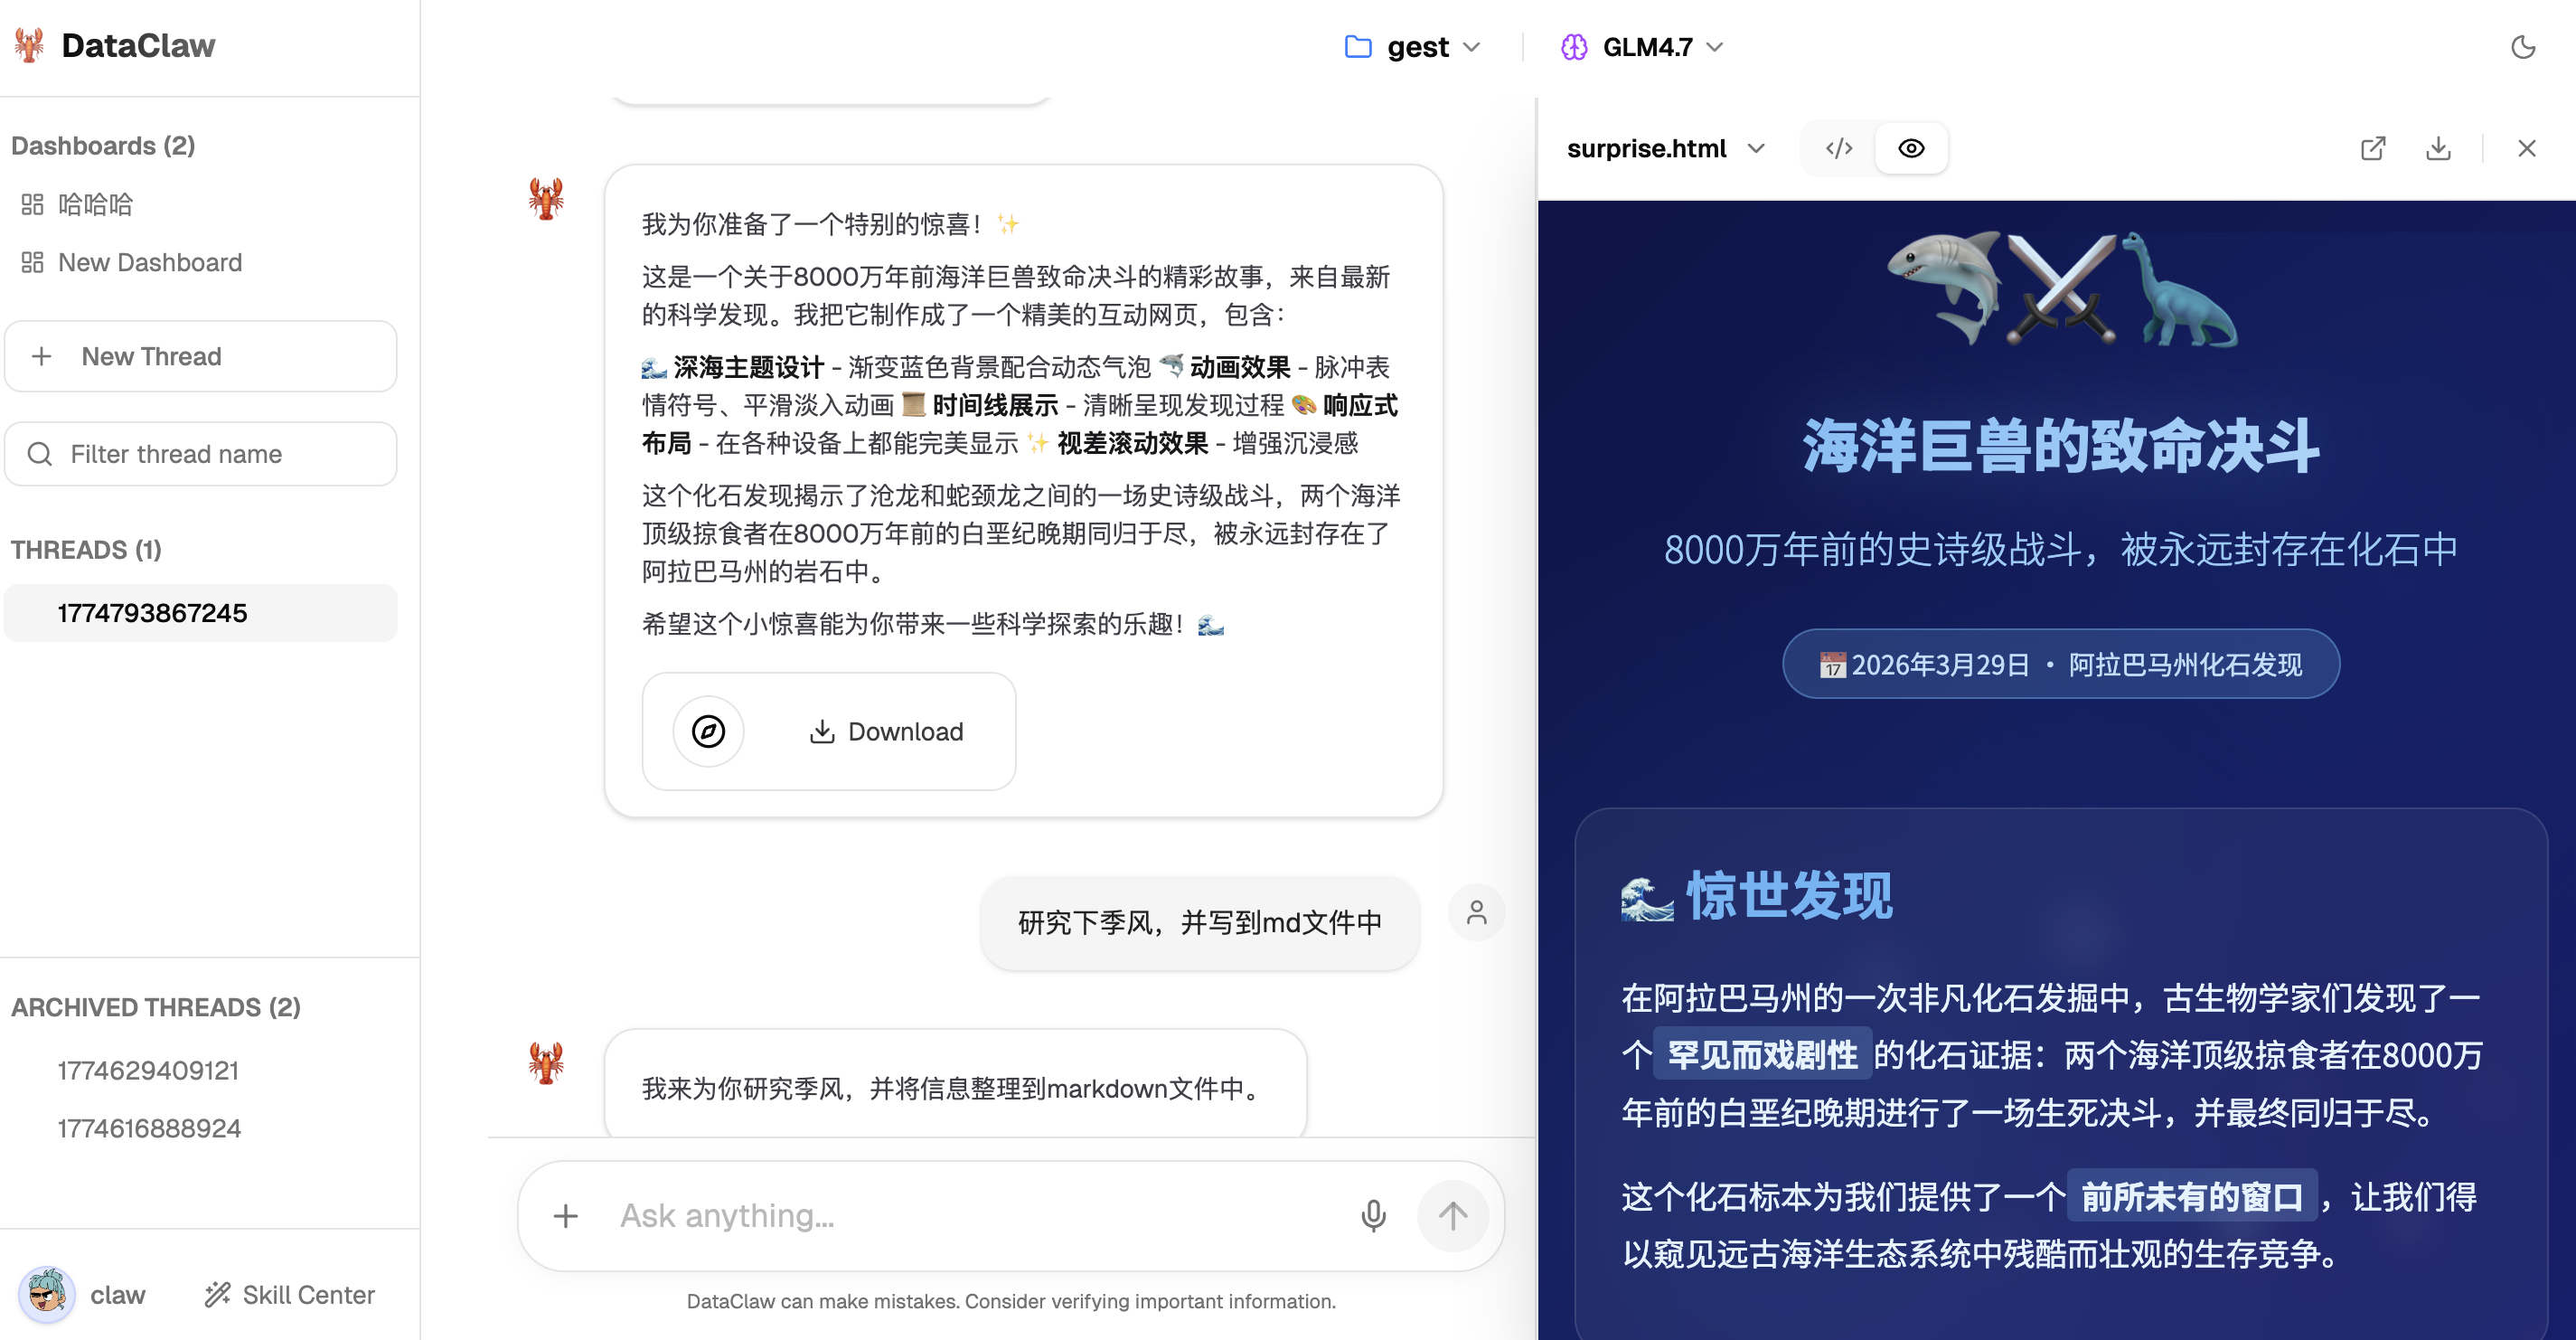
- **📦 Intelligent Artifact Management**: Automatically extracts generated files (HTML reports, PDFs, PPTs, images, etc.) from conversations, providing embedded previews and one-click downloads.
***
## 📸 Screenshots
💬 Chat Interface
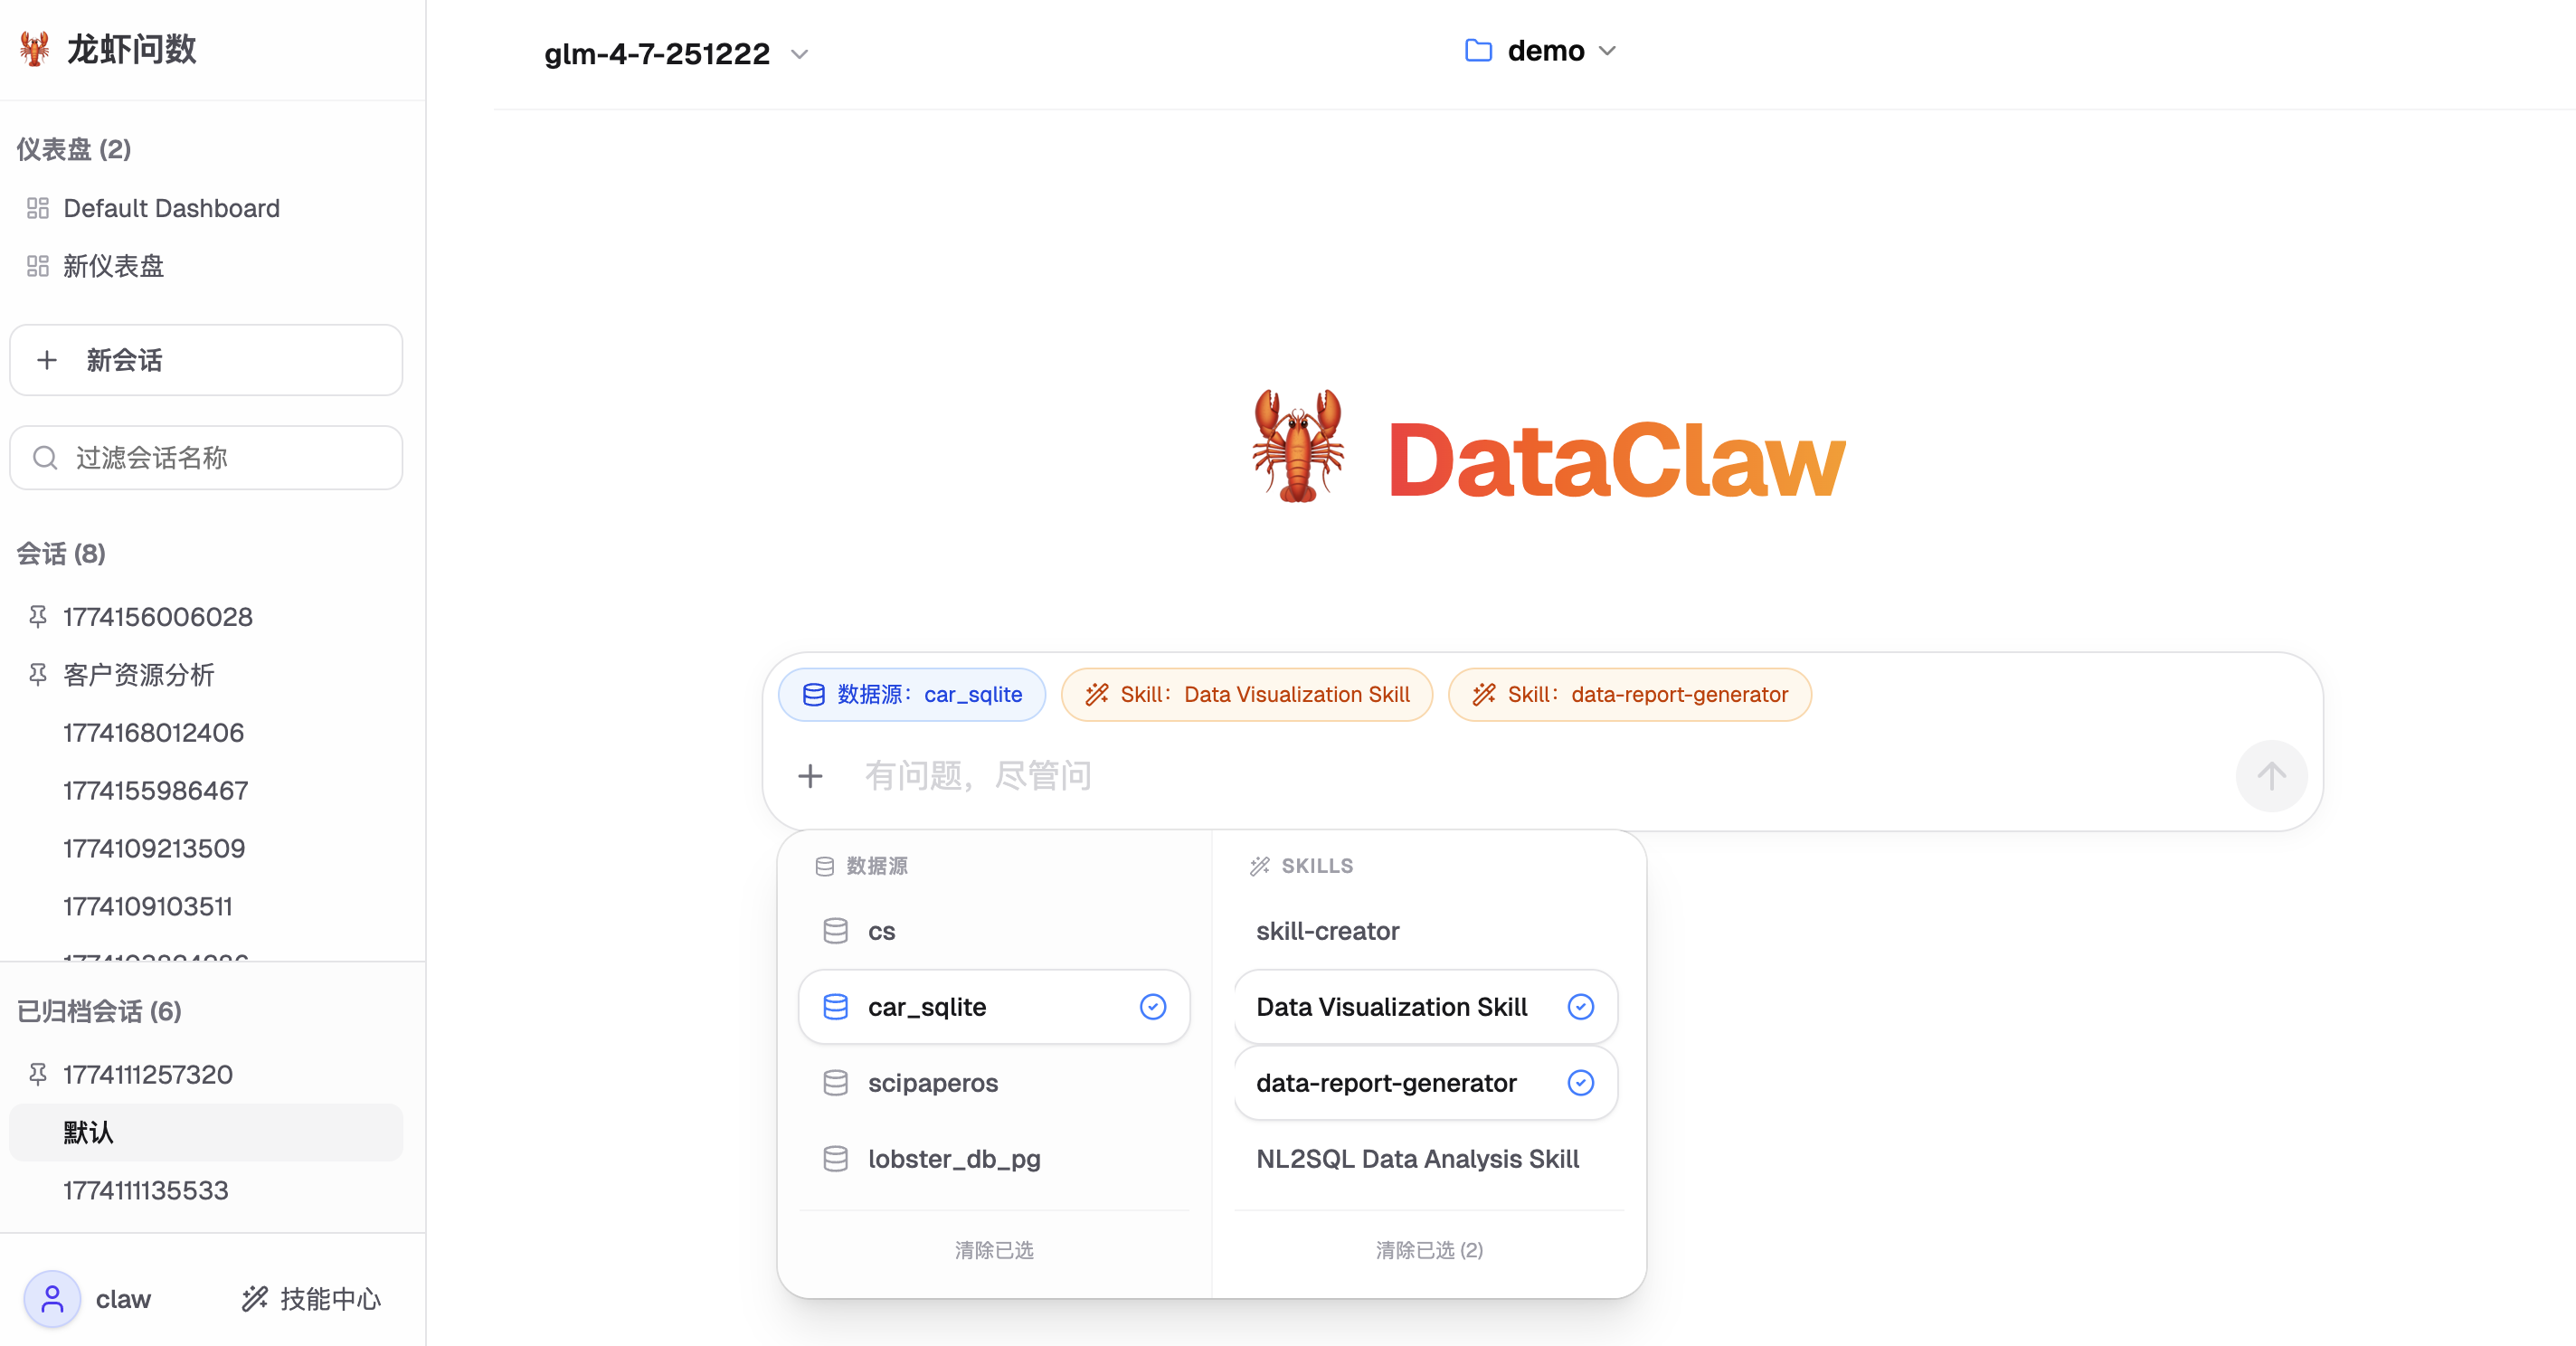
📊 Customizable Dashboard
📚 Smart Knowledge Base
📦 Artifact Preview
## 🏗️ Architecture
DataClaw's architecture mainly consists of four core components:
1. **`frontend/`** 🎨: The shiny shell. Built with **React 19**, **Vite**, **TailwindCSS**, and **Zustand**. It features a chat-like interface, streaming AI responses, and interactive Vega charts.
2. **`backend/`** ⚙️: The muscle. A **FastAPI** application managing projects, data source connections, user sessions, and API gateways.
3. **`nanobot/`** 🧠: The brain. The core AI agent framework handling NL2SQL, schema caching, prompt injection, and LLM routing.
4. **`data/`** 🗄️: Runtime data root. Decoupled from code directories and used for uploads, sessions, workspace skills, reports, and cached configs.
```mermaid
graph TD
User([👤 User / Browser]) -->|HTTP / WebSocket| Frontend
subgraph DataClaw System
Frontend[🎨 frontend
React / Vite / Zustand]
Backend[⚙️ backend
FastAPI / Session / Data Sources]
Nanobot[🧠 nanobot
AI Agent / NL2SQL / RAG]
Data[🗄️ data
Runtime Files / Artifacts]
Frontend -->|REST API / SSE| Backend
Backend <-->|Task Delegation / Calling| Nanobot
Backend -->|Read / Write| Data
Nanobot -->|Read / Write| Data
end
subgraph External Services
LLM([🤖 LLM Providers
OpenAI, DeepSeek, etc.])
DB[(📊 Data Sources
PostgreSQL, CSV, Supabase)]
end
Nanobot <-->|Prompt / Completion| LLM
Backend <-->|Connect / Query| DB
Nanobot -.->|Schema Retrieval / Exec| DB
```
***
## 🚀 Quick Start
Ready to dive in? Let's get DataClaw running on your local machine!
### 1. Configure Environment Variables 🔧
In the root directory of the project, copy and rename the environment template:
```bash
cp .env.example .env
```
Please edit the `.env` file in the root directory and fill in your actual configurations (e.g., QQ Mail SMTP Auth Code).
> **Guide to getting QQ Mail SMTP Auth Code:**
> 1. Log in to QQ Mail web version (mail.qq.com)
> 2. Click "Settings" (设置) at the top of the page -> "Account" (账号) tab
> 3. Scroll down to find the "POP3/IMAP/SMTP/Exchange/CardDAV/CalDAV Service" section
> 4. Ensure "POP3/SMTP Service" is toggled to "On" (开启)
> 5. Click "Generate Authorization Code" (生成授权码) below it, scan the QR code with mobile QQ or send an SMS as prompted
> 6. After verification, you will get a **16-digit random letter combination**. Copy and paste it into the `SMTP_PASSWORD` field in your `.env` file
### 2. Production Mode (Recommended, No Node.js Required) 📦
Ensure you have Python 3.11+ installed. The pre-built React frontend is bundled in the Python wheel, so you don't need Node.js for production deployment.
#### 2.1 Build the wheel (output to `dist/`)
```bash
# First, build the frontend
cd frontend
npm install
npm run build
# Then, build the backend wheel
cd ../backend
uv build --wheel --out-dir ../dist
```
Once built, the wheel is located in the project root `dist/` directory, e.g., `dist/dataclaw-0.1.0-py3-none-any.whl`.
#### 2.2 Install and Run (using the wheel from 2.1)
Ensure Python 3.11+ and `uv` are installed. Production mode uses the packaged wheel from 2.1, and does not require Node.js.
```bash
# Create an isolated virtual environment in project root
uv venv .venv
source .venv/bin/activate
# Install built wheel into that environment
uv pip install ./dist/dataclaw-*.whl
# Start the service (defaults to http://127.0.0.1:8000)
dataclaw start
```
Common service control commands:
```bash
# Check running status
dataclaw status
# Custom host/port
dataclaw start --host 0.0.0.0 --port 8000
# Stop the service
dataclaw stop
```
Optional environment variable:
```bash
export DATA_ROOT=/absolute/path/to/data
```
If not set, DataClaw uses the repository-level `data/` directory by default. Service state files and logs are located in `DATA_ROOT/run/`.
### 3. Development Mode (Requires Node.js) 🧪
If you want to debug source code, use development mode (runs source directly, no wheel required):
```bash
cd backend
# Sync backend dependencies (environment is prepared under backend/.venv)
uv sync
# Start the FastAPI server
uv run uvicorn main:app --reload --port 8000
```
```bash
cd frontend
# Install dependencies
npm install
# Start the Vite development server
npm run dev
```
*Note: Ensure your* *`nanobot`* *is properly linked or installed in editable mode as per the project workspace.*
### 4. Optional Voice Service 🎙️
If you want to use voice input in chat, run the standalone `whisper` service:
```bash
cd whisper
uv venv
uv pip install -r requirements.txt
uv run python main.py
```
Default service URL: `http://localhost:8001`
Health endpoint: `GET /health`
Frontend setup:
1. Click the username in the bottom-left to open the user menu;
2. Open `Voice Input Settings`;
3. Fill in the service URL (e.g. `http://localhost:8001`);
4. Click `Test Connection`, then `Save`.
### 5. Initial Account Setup 👤
The first user to register in the system will automatically be granted admin privileges. You can simply click the "Register" button on the login page to create your admin account (e.g., Username: `admin`, Password: `admin`), and then log in to manage projects, data sources, and users.
### 6. A2A Mode Guide 🤖
A2A (Agent2Agent) lets DataClaw delegate tasks to remote agents with full task lifecycle controls (status stream, artifact stream, cancel, retry).
#### 6.1 Enable A2A in UI (Recommended)
1. Open **Skills** page and switch to the **A2A** tab.
2. Add a remote agent with:
- `name`
- `base_url` (for example `https://agent-b.example.com`)
- `auth_scheme` (`none` or `bearer`)
- `auth_token` (required when `auth_scheme=bearer`)
3. Run health check and confirm `healthy=true`.
4. Go to Chat, enable **A2A Mode**, choose `route_mode` and remote agent, then send your prompt.
5. Track task states in Chat (`SUBMITTED/WORKING/COMPLETED/FAILED`) and use cancel/retry when needed.
`route_mode` quick reference:
- `auto`: Use project rollout policy and routing strategy
- `local`: Force local execution
- `a2a`: Force remote A2A execution
- `a2a_first`: Try remote first, then fallback chain
- `local_first`: Try local first
#### 6.2 API Examples
Assume service URL is `http://127.0.0.1:8000` and your bearer token is `${TOKEN}`.
```bash
# 1) Get local Agent Card
curl -H "Authorization: Bearer ${TOKEN}" \
http://127.0.0.1:8000/api/v1/a2a/agent-card
# 2) Register remote agent
curl -X POST http://127.0.0.1:8000/api/v1/a2a/remote-agents \
-H "Authorization: Bearer ${TOKEN}" \
-H "Content-Type: application/json" \
-d '{
"project_id": 1,
"name": "Agent-B",
"base_url": "https://agent-b.example.com",
"auth_scheme": "bearer",
"auth_token": "remote-agent-token"
}'
# 3) Send task with a2a_first route
curl -X POST http://127.0.0.1:8000/api/v1/a2a/messages/send \
-H "Authorization: Bearer ${TOKEN}" \
-H "Content-Type: application/json" \
-d '{
"project_id": 1,
"message": "Analyze order conversion trend for last 30 days and propose actions",
"session_id": "chat:demo-a2a",
"remote_agent_id": 3,
"route_mode": "a2a_first",
"fallback_chain": ["a2a", "local", "mcp"],
"idempotency_key": "demo-a2a-001"
}'
# 4) Subscribe task stream
curl -N -H "Authorization: Bearer ${TOKEN}" \
http://127.0.0.1:8000/api/v1/a2a/tasks//subscribe
# 5) Cancel task
curl -X POST -H "Authorization: Bearer ${TOKEN}" \
http://127.0.0.1:8000/api/v1/a2a/tasks//cancel
```
#### 6.3 Local Debugging for A2A (Two-Instance Setup)
Use two local backend instances:
- Instance A (caller): `http://127.0.0.1:8000`
- Instance B (remote agent): `http://127.0.0.1:8001`
Run them in two terminals:
```bash
# Terminal 1 - Instance A
cd backend
DATA_ROOT=/tmp/dataclaw-a uv run uvicorn main:app --reload --port 8000
```
```bash
# Terminal 2 - Instance B
cd backend
DATA_ROOT=/tmp/dataclaw-b uv run uvicorn main:app --reload --port 8001
```
Create/login users and fetch tokens:
```bash
# Register (first user becomes admin) - run once per instance
curl -X POST http://127.0.0.1:8000/api/v1/auth/register \
-H "Content-Type: application/json" \
-d '{"username":"admin_a","email":"a@test.com","password":"admin12345"}'
curl -X POST http://127.0.0.1:8001/api/v1/auth/register \
-H "Content-Type: application/json" \
-d '{"username":"admin_b","email":"b@test.com","password":"admin12345"}'
# Login and keep tokens
TOKEN_A=$(curl -s -X POST http://127.0.0.1:8000/api/v1/auth/login \
-H "Content-Type: application/x-www-form-urlencoded" \
-d "username=admin_a&password=admin12345" | jq -r '.access_token')
TOKEN_B=$(curl -s -X POST http://127.0.0.1:8001/api/v1/auth/login \
-H "Content-Type: application/x-www-form-urlencoded" \
-d "username=admin_b&password=admin12345" | jq -r '.access_token')
```
Then register B as remote agent in A, using `TOKEN_B` as `auth_token`:
```bash
curl -X POST http://127.0.0.1:8000/api/v1/a2a/remote-agents \
-H "Authorization: Bearer ${TOKEN_A}" \
-H "Content-Type: application/json" \
-d "{
\"project_id\": 1,
\"name\": \"local-agent-b\",
\"base_url\": \"http://127.0.0.1:8001\",
\"auth_scheme\": \"bearer\",
\"auth_token\": \"${TOKEN_B}\"
}"
```
Finally, send/subscribe/cancel tasks from A. This validates the complete local A2A flow.
***
## 🔌 Data Source Configuration Guide
DataClaw supports connecting to various types of data sources to meet different analysis needs. You can click **+** in the **Data Sources** menu to create and configure them. Here are detailed connection guides for common data sources:
▶ PostgreSQL (pgsql)
Connects to standard relational databases. You can either fill in the individual parameters through the form or paste a complete Connection String directly.
- **Host**: The host address of the database. If you are running the database on your local machine (e.g., using pgAdmin), please enter `127.0.0.1` (do not enter `localhost` to avoid Unix Socket resolution errors).
- **Port**: Typically defaults to `5432`.
- **Database**: The specific name of the database you want to connect to.
- **Username / Password**: Database authentication credentials (the default user is usually `postgres`).
- **Connection String (Optional)**: You can also directly input a string like `postgresql://postgres:your_password@127.0.0.1:5432/your_database_name`, which will override the individual input fields above.
▶ Supabase
A connection method specifically optimized for Supabase cloud PostgreSQL databases, enforcing SSL and using connection pools by default to improve stability.
- We recommend using the **Connection String** configuration directly:
Go to your Supabase project console -> `Project Settings` -> `Database` -> `Connection string` -> Select the `URI` tab.
Copy the link that looks like `postgresql://postgres.[project-ref]:[password]@aws-0-[region].pooler.supabase.com:6543/postgres?sslmode=require` and paste it in.
- *Note*: Supabase enables Transaction Pooler by default (Port 6543). If you want a Direct connection, change the port to `5432` and ensure the URL includes `sslmode=require`.
▶ SQLite
A lightweight local file-based database, perfect for quick testing or analyzing single-machine application data.
- **File Upload**: You can directly click the button to upload a `.db`, `.sqlite`, or `.sqlite3` database file from your local machine. The file will be securely saved in the server's upload directory for analysis.
- **File Path (Advanced)**: If the service is deployed on a server and the SQLite file already exists at an absolute path on the server, you can also enter the absolute path directly in the input box (e.g., `/data/my_app.db`).
▶ CSV
The most common data exchange format, plug-and-play, no complex database configuration required.
- **File Upload**: Similar to SQLite, click the button to select and upload a local `.csv` file. The system will use engines like DuckDB or Pandas in the background to virtualize it into an SQL-queryable table.
- Once uploaded successfully, you can query this CSV file directly as if it were a database table in the chat interface!
***
## 🤝 Contributing
Got a cool idea? Found a bug? We'd love your help! Feel free to open an issue or submit a pull request. Let's make data analysis fun again!
***
## 💖 Acknowledgements
The development of DataClaw was deeply inspired by the following excellent open-source projects. Special thanks to:
- [WrenAI](https://github.com/Canner/WrenAI): A powerful Text-to-SQL solution whose architecture and concepts provided great inspiration.
- [Aix-DB](https://github.com/apconw/Aix-DB): Provided an excellent reference for intelligent data analysis and interactive user experience.